

|
| (Documentation for the EXPERT View menu) |

|
|
|
|
| (to DFSee main pages) | File | Edit | Actions | Image | View | Scripts | Set | Help | (to BASIC menu) |
| Mode=FDISK | APFS | AUX | DUMPFS | EXTn | EFAT | FAT | HFS+ | HPFS | ISO | JFS | NTFS | REISER | SWAP | XFS |

Compact, one line per disk, info on size, name, vendor/product and more
    This will display a compact list of all attached disks
    using the 'disklist' command

    For each disk one line of information with names, sizes and
    other optional info like vendor/product names is displayed.

    This is very useful to IDENTIFY each disk uniquely, for example before doing a clone, image-resore or partitioning operation.

    Note that a 'disk' can be any partionable media supported by
    DFSee, like physical disks, virtual-disks and others ...

    - - - - - - - - - - - - - - - - - - - - - - - - - - - - - - - - - - - - - - - - - -
    Press <F1> again for more help; Some options may require switching to 'Expert mode'
Compact map display of all partitionable media, showing the partitions

    This will display an overview of the partitionable media.

    For each disk a pseudo-graphical map will be shown, with each
    partition or freespace area sized and colored according to its
    real size and type of filesystem being used.

    Some key information for each area will be shown inside each
    partition or freespace area displayed.
    Note that a 'disk' can be any partionable media supported by
    DFSee, like physical disks, virtual-disks and others ...

    - - - - - - - - - - - - - - - - - - - - - - - - - - - - - - - - - - - - - - - - - -
    Press <F1> again for more help; Some options may require switching to 'Expert mode'
Screen-size map of disk or filesystem usage, allocated versus freespace info

    Display a usage map for the currently selected disk or filesystem

    A pseudo-graphical map of the disk or partition allocation is
    displayed, showing the distribution of data over the object

    This is also an indication for the amount of unused sectors in
    the object, that are beneficial to 'SMART-SECTOR' optimizations
    in imaging and cloning operations.

    The percentage of used sectors are displayed as a percentage at
    the end of the line, and a total usage percentage and size is
    shown just after the map itself.

    For filesystems that support resizing, the limits for resizing
    are shown after the map itself.

    - - - - - - - - - - - - - - - - - - - - - - - - - - - - - - - - - - - - - - - - - -
    Press <F1> again for more help; Some options may require switching to 'Expert mode'
Show (disk) geometry for currently opened object, including some status info

    This will display the (disk) geometry currently used by DFSee

    The geometry, as a Cylinder, Head and Sectors-per-track count
    plus the size in a hexadecimal sectorcount and in MIB can be:

       L-Geo, the logical geometry, used by DFSee for all its work

       S-Geo, the system geometry, as reported by the operating system
              only displayed when different from the logical geometry.

    As with nmost commands, the display ends with a status overview of
    the currently opened object in just two lines that show you what
    type and size of object is opened, and what the current/next/prev
    positions in that object are, shown as hexadecimal sectornumbers.

    - - - - - - - - - - - - - - - - - - - - - - - - - - - - - - - - - - - - - - - - - -
    Press <F1> again for more help; Some options may require switching to 'Expert mode'
Show list of available volumes/driveletters (updates submenu VOL list too)

    This will display a simple list of all volumes (driveletters)
    that are known by the current active operatiung system.

    This list is the same as used by the file-dialogs and the
    'open-volume' menu selection, in a slightly different format.

    - - - - - - - - - - - - - - - - - - - - - - - - - - - - - - - - - - - - - - - - - -
    Press <F1> again for more help; Some options may require switching to 'Expert mode'
Display a compact table with the most important partition information

    This will present an overview of all available partitions
    on all disks, in the default format.

    This is the same list as used in the 'open partition' menu.

    - - - - - - - - - - - - - - - - - - - - - - - - - - - - - - - - - - - - - - - - - -
    Press <F1> again for more help; Some options may require switching to 'Expert mode'
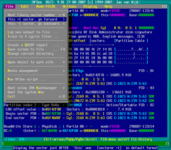
Submenu with several partition views and check-actions on the current object
    Various formats and detail displaying the partition data:

     - ALL warnings, no table
     - Non-trivial warnings only

     - Partition extended   view
     - Partition decimal    view
     - Partition numeric    view
     - Partition complete   view
     - Partition verbose    view
     - Partition allocation view
     - Partition sector(s)  view

     - FS-check all partitions

    - - - - - - - - - - - - - - - - - - - - - - - - - - - - - - - - - - - - - - - - - -
    Press <F1> again for more help; Some options may require switching to 'Expert mode'
Compact table with partitions and ext-containers (part -r -e )

       As the standard overview but with an extra line of info for
       every extended-container (often type 0x05 or 0x0f).

    - - - - - - - - - - - - - - - - - - - - - - - - - - - - - - - - - - - - - - - - - -
    Press <F1> again for more help; Some options may require switching to 'Expert mode'
Compact table with decimal cylinders, begin/end/size (part -b:1 )

       As the standard overview but with decimal info on the
       start and end-cylinder, start and end-sector, size in
       sectors and in megabytes (default format on Linux)

       Recommended screen width: 90 columns or more

    - - - - - - - - - - - - - - - - - - - - - - - - - - - - - - - - - - - - - - - - - -
    Press <F1> again for more help; Some options may require switching to 'Expert mode'
Compact table with partitions, numeric cyls/sizes 94 cols (part -n )

       As the standard overview but with numeric values instead
       of the various label fields

    - - - - - - - - - - - - - - - - - - - - - - - - - - - - - - - - - - - - - - - - - -
    Press <F1> again for more help; Some options may require switching to 'Expert mode'
Compact table with numeric info plus ext-containers 94 cols (part -n -e )

       As the extended overview but with full numeric info.

    - - - - - - - - - - - - - - - - - - - - - - - - - - - - - - - - - - - - - - - - - -
    Press <F1> again for more help; Some options may require switching to 'Expert mode'
One line per partition, many fields, comma separated 242 cols (part -r -s )

       This is a table with one line per partition, but nearly ALL
       available fields present in a COMMA SEPARATED format.
       It can be used to get transport this information to other
       applications by means of the logfile, with more complete
       info than the standard feature 'dfsee -query'.

       Recommended screen width: huge, information is 242 columns

    - - - - - - - - - - - - - - - - - - - - - - - - - - - - - - - - - - - - - - - - - -
    Press <F1> again for more help; Some options may require switching to 'Expert mode'
Display ALL warnings for all partitions, no table 80 cols (part -w -t-)
       This is a list of ALL warnings, minor and major for ALL
       partitions on all disks. There is NO table with other info
       and no other detailed info about the partitions either.

    - - - - - - - - - - - - - - - - - - - - - - - - - - - - - - - - - - - - - - - - - -
    Press <F1> again for more help; Some options may require switching to 'Expert mode'
Display non-trivial warnings (major + some minor) 80 cols (part -w:t -t-)
       This is a list of NON-TRIVIAL warnings, some minor and all major,
       for ALL partitions on all disks. There is NO table with other info
       and no other detailed info about the partitions either.

    - - - - - - - - - - - - - - - - - - - - - - - - - - - - - - - - - - - - - - - - - -
    Press <F1> again for more help; Some options may require switching to 'Expert mode'
Verbose list of basic partition info for all partitions (part -r -v )

       A full page of detailed partition information for every partition.

    - - - - - - - - - - - - - - - - - - - - - - - - - - - - - - - - - - - - - - - - - -
    Press <F1> again for more help; Some options may require switching to 'Expert mode'
Verbose list of partition info, allocation-maps, contents (part -a -V )

       Like verbose, but with the allocation map for the partition added
       and some contents. This is often the root-directory, depending on
       the filesystem being listed.

    - - - - - - - - - - - - - - - - - - - - - - - - - - - - - - - - - - - - - - - - - -
    Press <F1> again for more help; Some options may require switching to 'Expert mode'
Verbose list of MBR/EBR, PBR, LVM sectors on all partitions (pt * -related )

       Detailed display of all sectors that are related to each partition:
       - MBR or EBR with the partition-table entry for the partition
       - PBR (bootsector) for the partition
       - On LVM systems, the LVM-info sector (DLAT in IBM terms)
       - On LVM systems, LVM/JFS partitions, the LVM-signature sector

       This is an 'all partitions/all disks' version of menu item:

                   View -> Sectors for partition -> ... select ...

    - - - - - - - - - - - - - - - - - - - - - - - - - - - - - - - - - - - - - - - - - -
    Press <F1> again for more help; Some options may require switching to 'Expert mode'
Perform filesystem check on all partitions, verbose display (part -r -c )

    This is a form of the verbose partition list, that will include
    a 'check' of the filesystem in every partition, if that is
    supported in DFSee for the filesystem in question.

    Note that this is similar in function to the familiar CHKDSK on,
    Dos, Windows or OS/2 but is does checking only, there is NO writing
    to the disk at all, and found errors will NOT be repaired!

    Some of the reported errors can be fixed by using other 'FIX...'
    commands available in DFSee, othere will have to be fixed by
    other means, for example: 'CHKDSK /f'.

    - - - - - - - - - - - - - - - - - - - - - - - - - - - - - - - - - - - - - - - - - -
    Press <F1> again for more help; Some options may require switching to 'Expert mode'
Show the 'Base' values, corresponding to the first LSN (0) and the last one

    This will display the sectornumbers (PSN) for the first valid LSN (0)
    and the last valid one (end of partition/volume/image).

    The disk-number that is active will be displayed when applicable,
    a disk-number of 0 will be used for non-disk objects like images.

    - - - - - - - - - - - - - - - - - - - - - - - - - - - - - - - - - - - - - - - - - -
    Press <F1> again for more help; Some options may require switching to 'Expert mode'
Show what object (disk/partition ...) is currently open for working with it

    This will display details about the currently opened object(s), if any.

    This will show some information about the object that has been opened
    to work with it. This could be after an explicit 'Open ..' selection
    from the 'File' menu, or an implicit open by some other command or menu
    selection made previously.

    The display show information kept for all open objects in the 'STORE'
    administration that can hold information about three simultaneously
    open objects (see 'STORE' command documentation).

    Normally, only a single object will be opened, using the CURRENT store,
    but commands like 'CLONE' will use the second 'ALTERNATE' store as well
    keeping information about the source of the clone ...

    - - - - - - - - - - - - - - - - - - - - - - - - - - - - - - - - - - - - - - - - - -
    Press <F1> again for more help; Some options may require switching to 'Expert mode'
Show mapping of DFSee disk-id to Partitionable Media like disks and devices

    This will display a table showing the relationship between:

      Disk-id         The disk-id as used in many DFSee commands
      DFSee-type      Type of medium for DFSee, physical, virtual ...
      disk number     Real disk number, specific to the type of medium
      Description     The (Linux) device name for this disk device,
                      an Image filename and/or details on the medium

    All entries in this table can be used as a 'disk' in the many
    DFSee commands that deal with them, and these are also listed
    in the default partition and MAP displays in DFSee.

    Note that the 'Disk-id' is really a 'Partionable Medium Id',

    - - - - - - - - - - - - - - - - - - - - - - - - - - - - - - - - - - - - - - - - - -
    Press <F1> again for more help; Some options may require switching to 'Expert mode'
List the LVM information (DLAT and BBR areas) for selected partition(s)

    This will display the LVM information for the selected partition(s)

    It will display the LVM-info sector (DLAT), and for type 0x35
    partitions the LVM-signature sector (BBR area) as well.

    The info is displayed formatted on a sector-by-sector basis.

    - - - - - - - - - - - - - - - - - - - - - - - - - - - - - - - - - - - - - - - - - -
    Press <F1> again for more help; Some options may require switching to 'Expert mode'
Selection of this item leads to a dynamic created submenu, to select a partition to be used , including 'ALL partitions'
List all partition-table info for a disk, in raw format. Walk MBR/EBR or GPT

    This will display all partition-tables for the selected disk, starting
    with the MBR for the PRIMARY partitions and the EXTENDED container.

    When logicals are present, this is followed by walking the linked EBR
    sectors that each define a single LOGICAL partition and the link to
    the next one, if any.

    - - - - - - - - - - - - - - - - - - - - - - - - - - - - - - - - - - - - - - - - - -
    Press <F1> again for more help; Some options may require switching to 'Expert mode'
Selection of this item leads to a dynamic created submenu, to select a disk to be used
Show part-table (MBR/EBR), bootsector (PBR) and LVM-info for one partition

    This will display all partitioning related sectors for a partition,
    the MBR or EBR sector, the bootsector (PBR) and LVM sectors, if any.

    This is the quickest way to get all partitioning related information
    displayed for one partition.

    It uses the 'pt  PID  -r' command to show the partition-table entry
    and all related sectors for the selected partition 'PID'.

    To display this related sector(s) information for all partitions, use:

          View -> Other partition views -> Part sector(s) view

    Note: If you have a partition, volume or device selected, and are NOT
          in FDISK mode, this selection will switch to that automatically
          invalidating your current selection!

    - - - - - - - - - - - - - - - - - - - - - - - - - - - - - - - - - - - - - - - - - -
    Press <F1> again for more help; Some options may require switching to 'Expert mode'
Selection of this item leads to a dynamic created submenu, to select a partition to be used
Show just the partition-table sector (MBR/EBR) for one partition

    This will display the sector with the partition-table for a partition,

    It uses the 'pt  PID' command to show the partition-table entry.

    Note: If you have a partition, volume or device selected, and are NOT
          in FDISK mode, this selection will switch to that automatically
          invalidating your current selection!

    - - - - - - - - - - - - - - - - - - - - - - - - - - - - - - - - - - - - - - - - - -
    Press <F1> again for more help; Some options may require switching to 'Expert mode'
Selection of this item leads to a dynamic created submenu, to select a partition to be used
Display sector with specified sectornumber; LSN default 0 (bootsect/MBR)

    This will allow you to display any sector on the current opened store
    by specifying the sectornumber in hexadecimal format.

    The display will use the DEFAULT format for the type of sector found.

    - - - - - - - - - - - - - - - - - - - - - - - - - - - - - - - - - - - - - - - - - -
    Press <F1> again for more help; Some options may require switching to 'Expert mode'
Display some related sectors (up,xtra,next) or 'this' in HEX/ASCII format
    HEX and ASCII formats for 'this' sector, and default display for:

     - Next   Related sector most likely to be displayed as next

     - Up     Related sector, probably upwards in (directory) hierarchy

     - Xtra   Related sector, somehow linked to the 'this' sector

     - This   The current sector, 'this' redisplay in default format

    - - - - - - - - - - - - - - - - - - - - - - - - - - - - - - - - - - - - - - - - - -
    Press <F1> again for more help; Some options may require switching to 'Expert mode'
Display most likely desired 'next' sector (in hierarchy) in default format

    This will display the 'next likely' sector on the current opened store
    by using the 'next' value set by any previous display of a sector.

    Displaying the 'next' sector (Ctrl+N) on an opened filesystem will
    show the most interesting sectors like bootsector, superblocks etc.

    In general, each display function will set this 'next' value to the
    sector that is the most 'desirable' to be visited/displayed next.

    - - - - - - - - - - - - - - - - - - - - - - - - - - - - - - - - - - - - - - - - - -
    Press <F1> again for more help; Some options may require switching to 'Expert mode'
Display related, referencing, 'up' sector (in hierarchy) in default format

    This will display the 'up' sector on the current opened store
    by using the 'up' value set by any previous display of a sector.

    In general, each display function will set this 'up' value to a
    sector that is related, and probably 'upwards' in the hierarchy
    from the current sector.
    As an example, when displaying an HPFS file FNODE, the 'up' will
    take you to the directory FNODE of the directory holding the file.

    - - - - - - - - - - - - - - - - - - - - - - - - - - - - - - - - - - - - - - - - - -
    Press <F1> again for more help; Some options may require switching to 'Expert mode'
Display related (somehow :-) 'xtra' sector in default format

    This will display the related 'eXtra' sector on the current opened store
    by using the 'xtra' value set by any previous display of a sector.

    In general, each display function will set this 'xtra' value to a
    sector that might be of interest.

    As an example, when displaying a partition-table sector, the 'xtra'
    will take you to the related LVM DLAT sector for that partition.

    - - - - - - - - - - - - - - - - - - - - - - - - - - - - - - - - - - - - - - - - - -
    Press <F1> again for more help; Some options may require switching to 'Expert mode'
Display the sector just AFTER 'this' one (sectornr +1) in default format
    This will display the sector AFTER the current one (this),
    in the default format for the type of sector found there.

    - - - - - - - - - - - - - - - - - - - - - - - - - - - - - - - - - - - - - - - - - -
    Press <F1> again for more help; Some options may require switching to 'Expert mode'
Display the sector just BEFORE 'this' one (sectornr -1) in default format
    This will display the sector BEFORE the current one (this),
    in the default format for the type of sector found there.

    - - - - - - - - - - - - - - - - - - - - - - - - - - - - - - - - - - - - - - - - - -
    Press <F1> again for more help; Some options may require switching to 'Expert mode'
Display the current 'this' sector in the default, best matching format
    This will (re-) display the current sector in the default format for
    the type of sector found at the 'This' location.

    - - - - - - - - - - - - - - - - - - - - - - - - - - - - - - - - - - - - - - - - - -
    Press <F1> again for more help; Some options may require switching to 'Expert mode'
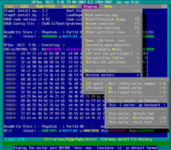
Display the current 'this' sector as HEX/BINARY dump, including ASCII

    This will display the FULL current sector in a hexadecimal format,
    often referred to as 'HEXDUMP' style.

    This contains a hexadecimal value for each byte in the sector, with
    sixteen bytes per display line, plus the ASCII representation of
    these same bytes if printable, and dots otherwise.

    - - - - - - - - - - - - - - - - - - - - - - - - - - - - - - - - - - - - - - - - - -
    Press <F1> again for more help; Some options may require switching to 'Expert mode'
Display the current 'this' sector as ASCII text (garbage for non-ASCII!)

    This will attempt to display the complete sector as an ASCII text

    It may produce garbage displays when the data is not (completely)
    suitable to be displayed in ASCII.

    This display might be useful to display (ASCII) sectors from a file.

    - - - - - - - - - - - - - - - - - - - - - - - - - - - - - - - - - - - - - - - - - -
    Press <F1> again for more help; Some options may require switching to 'Expert mode'
Measure and display the RAW I/O speed for 10 seconds Read-only access

    This will measure and display the I/O speed for a 10 second interval

    The current objecty (disk, partition etc) will be read only, using
    the default or specified buffer size.

    After completing the 10 second interval, or reaching the end of the
    object, the throughput will be displayed.

    - - - - - - - - - - - - - - - - - - - - - - - - - - - - - - - - - - - - - - - - - -
    Press <F1> again for more help; Some options may require switching to 'Expert mode'
Measure and display the RAW I/O speed for 10 seconds Read-Write access

    This will measure and display the I/O speed for a 10 second interval

    The current objecty (disk, partition etc) will be Read and Written
    to using the default or specified buffer size.

    After completing the 10 second interval, or reaching the end of the
    object, the througput will be displayed.

    Because reading and directly writing the SAME area will have a very
    high impact on performce (cache, head-movement), expect a Read/Write
    throughput at least 10 times less than Read-only!

    - - - - - - - - - - - - - - - - - - - - - - - - - - - - - - - - - - - - - - - - - -
    Press <F1> again for more help; Some options may require switching to 'Expert mode'
Measure RAW I/O speed using a larger buffer, default for compressed IMAGING

    This will measure and display the I/O speed for a 10 second interval
    using a relatively LARGE buffer, often faster than a small one.

    The current objecty (disk, partition etc) will be read only,
    using the same buffer size that is default for imaging, which
    is 256 KiB for the DOS version, and 2 MiB for the other platforms

    After completing the 10 second interval, or reaching the end of the
    object, the throughput will be displayed.

    - - - - - - - - - - - - - - - - - - - - - - - - - - - - - - - - - - - - - - - - - -
    Press <F1> again for more help; Some options may require switching to 'Expert mode'
| (to DFSee main pages) | File | Edit | Actions | Image | View | Scripts | Set | Help | (to BASIC menu) |
| Mode=FDISK | APFS | AUX | DUMPFS | EXTn | EFAT | FAT | HFS+ | HPFS | ISO | JFS | NTFS | REISER | SWAP | XFS |
| (View page) | DFSee menu documentation for pulldown : View |
| Views: 625680 |
|
Created by Jan van Wijk: Aug 2007, last update: 23-Oct-2022 |
|