

|
| (Documentation for the EXPERT Mode=EXTn menu) |

|
|
|
|
| (to DFSee main pages) | File | Edit | Actions | Image | View | Scripts | Set | Help | (to BASIC menu) |
| Mode=FDISK | APFS | AUX | DUMPFS | EXTn | EFAT | FAT | HFS+ | HPFS | ISO | JFS | NTFS | REISER | SWAP | XFS |
Display a pseudo-graphical map of used versus free sectors in the filesystem

    Display a usage map for the currently selected disk or filesystem

    A pseudo-graphical map of the disk or partition allocation is
    displayed, showing the distribution of data over the object

    This is also an indication for the amount of unused sectors in
    the object, that are beneficial to 'SMART-SECTOR' optimizations
    in imaging and cloning operations.

    The percentage of used sectors are displayed as a percentage at
    the end of the line, and a total usage percentage and size is
    shown just after the map itself.

    For filesystems that support resizing, the limits for resizing
    are shown after the map itself.

    - - - - - - - - - - - - - - - - - - - - - - - - - - - - - - - - - - - - - - - - - -
    Press <F1> again for more help; Some options may require switching to 'Expert mode'
Show allocation map, with exactly one line per Blockgroup in an aligned view

    Show allocation map, with exactly one line per Block-Group

    Because the allocation bitmap is displayed perfectly aligned with the
    Blockgroups, the distrubution of (meta)data over these groups becomes
    quite visible

    The diplay could become quite large for huge filesystems

    - - - - - - - - - - - - - - - - - - - - - - - - - - - - - - - - - - - - - - - - - -
    Press <F1> again for more help; Some options may require switching to 'Expert mode'
Find files or directories, list and possibly recover them. HEX edit dir/file

    This submenu offers selections to search for normal or deleted
    files, display the resulting lists and possibly recover files.

    It also offers selections to HEX-edit either the meta-information
    for a file (Inode) or the actual file contents

    - - - - - - - - - - - - - - - - - - - - - - - - - - - - - - - - - - - - - - - - - -
    Press <F1> again for more help; Some options may require switching to 'Expert mode'
Search non-deleted files in existing directories (FAST), for 'Recover ...'

    This searches JUST the known INODE areas for INODEs of non-deleted
    regular files, where the given name matches the start of the filename
    specified.

    The sectornumbers of the found INODEs will be added to the DFSee
    sectorlist so can be used in later actions, or be exported to a file.

    The files contained in that list can be RECOVERED to any directory
    on the system, including a network, by using the 'RECOVER' command.

    Note: The filenames to be found are recognizable ONLY when extra
          information is available. In DFSee this can be any of:

          - Name cache, automatically built with the SLT (and CHECK)
            (SLT will be built automatically when not present yet)
          - DFSee specific 'magic' names added to the filesystem Inodes
            specifically for recovery. (CHECK -m command)
            (not implemented for EXTn yet, to be refined)

    - - - - - - - - - - - - - - - - - - - - - - - - - - - - - - - - - - - - - - - - - -
    Press <F1> again for more help; Some options may require switching to 'Expert mode'
Browse files/directories in a list from a single directory, or current list

    This will show the contents of a single directory, specified
    by a PATH from the ROOT directory, or by selecting a directory
    from the browse list itself (including the '..' directory).

    Alternatively, the CURRENT contents of the sectorlist can be
    browsed, when available (by specifying a '.' for the directory

    The list can be browsed in an interactive dialog, a bit like
    a regular filemanager.

    The dialog will allow 'actions' to be performed on the listed
    files/directories, using <ENTER> to get the popup menu:

                 - View contents, as ASCII on File/Dir
                 - View as x86 Assembler - disassembly
                 - HEX-edit, contents only on File/Dir
                 - Edit Contents, autoview on File/Dir
                 - View OS/2 EA or Xattr on a File/Dir
                 - Edit DATA area sectors for File/Dir
                 - Edit META:Inode/Fnode/MFT/Dir-entry
                 - Edit the base filename for File/Dir
                 - Copy/Recover File(s) to other drive
                 - Reduce list to SELECTED files only

    When the browse session is ended (<Esc> or <F3> key):

      - the SAME filesystem/partition stays selected
        You can restart browse the same partition with the <F9> key,
        or start browsing another partition from the Actions menu
        using: 'Actions -> Open Partition, Browse FS'

      - the sector-list contains the last browsed directory
        and can be viewed with commands like 'list -f

      - The last entry (file) that was selected will also be set
        as the current sector-location ('this'), so it easy to
        analyse that furthher, for example by using the HEX-editor
        that can be started with <F2>, or simply by viewing the
        sector using the <Enter> key.

    Note: When working in 'mode=FDISK' (with a whole disk opened)
          you will be presented with a selection-list to pick a
          partition with a filesystem first.

    - - - - - - - - - - - - - - - - - - - - - - - - - - - - - - - - - - - - - - - - - -
    Press <F1> again for more help; Some options may require switching to 'Expert mode'
Display (selected) files from the list, using a PATH+FILENAME wildcard

    This will display the DFSee sector-list in a compact format, suited
    to the data contained in the list

    This usually is a 'list -f' or a 'list -s' variant.

    - - - - - - - - - - - - - - - - - - - - - - - - - - - - - - - - - - - - - - - - - -
    Press <F1> again for more help; Some options may require switching to 'Expert mode'
Recover (selected) files from the list to a supplied recovery directory
    This will allow you to recover (copy) one or more of the files in the
    list to any local or network directory on your system.

    It will prompt for a destination directory first, using the last used
    one as a default. All files recovered in one go, will be recovered to
    this same directory, with their original path appended to retain the
    directory structure whenever possible.

    It will also prompt for a selection specification in the form of a
    full PATH+FILENAME wildcard and an optional allocation-percentage.

    As an example, the specification:

       '*mydoc*\*project_x*.doc%100'

       will recover all files that have 'mydoc' somewhere in the PATH,
       'project_x' in the filename and have an extension of '.doc' that
       seem to be 100% recoverable. (100% allocation-OK ranking).

    - - - - - - - - - - - - - - - - - - - - - - - - - - - - - - - - - - - - - - - - - -
    Press <F1> again for more help; Some options may require switching to 'Expert mode'
Recover the file associated with the CURRENT sector to a recovery directory
    This will allow you to recover (copy) the file represented by the
    CURRENT displayed sector, also called the 'THIS' sector to any local
    or network directory on your system.

    It will prompt for a destination directory first, using the last used
    one as a default. The file will be recovered with its original path
    appended to that to retain the directory structure whenever possible.

    The menu item will only be enabled (selectable) when the CURRENT sector
    represents a normal or deleted FILE for the filesystem involved.
    This means it has to be a type 'f' or 'z' sector, which is:

         For HPFS: an FNODE sector
         For JFS:  an INODE sector
         For NTFS: an MFT record

    - - - - - - - - - - - - - - - - - - - - - - - - - - - - - - - - - - - - - - - - - -
    Press <F1> again for more help; Some options may require switching to 'Expert mode'
Find info (FNODE/MFT-record etc) for ONE specified file/directory path
    This uses the specified path from the root-directory to locate
    detailed information for the file or directory for that path.
    This will be from the FNODE on HPFS, the MFT-record on NTFS or
    similar structures like Inodes on other filesystrems.

    The path and filename may contain spaces.

    When found the information will be displayed in the standard
    format as defined for the filesystem that is active.
    You can display related information like the directory entry
    or the actual file data from there using the U and D commands.

    You can also use the 'saveto' command or corresponding menu
    item 'Recover THIS file' to create a copy of this found file
    on the specified or default recovery destination
    (or use the combined menu option instead of this find :-)

    - - - - - - - - - - - - - - - - - - - - - - - - - - - - - - - - - - - - - - - - - -
    Press <F1> again for more help; Some options may require switching to 'Expert mode'
Find ONE file by full path+filename, and recover it to a recovery directory
    This uses the specified path starting from the ROOT to locate
    ONE specific file, and when found will issue a SAVETO command
    to recover the contents of this file to a recovery directory.

    The path and filename may contain spaces.

    Note:
    The recovered file will be placed directly in the specified
    recovery directory without the full original path, but with
    the proper filename retained (even on JFS :-).

    - - - - - - - - - - - - - - - - - - - - - - - - - - - - - - - - - - - - - - - - - -
    Press <F1> again for more help; Some options may require switching to 'Expert mode'
Find + edit FAT dir entry / HPFS fnode / JFS inode / NTFS MFTrec+small files

    This uses the specified path from the root-directory to locate
    information for the file or directory for that path.
    This will be from the FNODE on HPFS, the MFT-record on NTFS or
    similar structures like Inodes on other filesystrems.

    The path and filename may contain spaces.

    When found the information at THAT level (1st, direct)
    will be opened in the standard HEX editor

    This will often be META-data about the file or directory,
    with a layout strongly defined by the filesystem type

    - - - - - - - - - - - - - - - - - - - - - - - - - - - - - - - - - - - - - - - - - -
    Press <F1> again for more help; Some options may require switching to 'Expert mode'
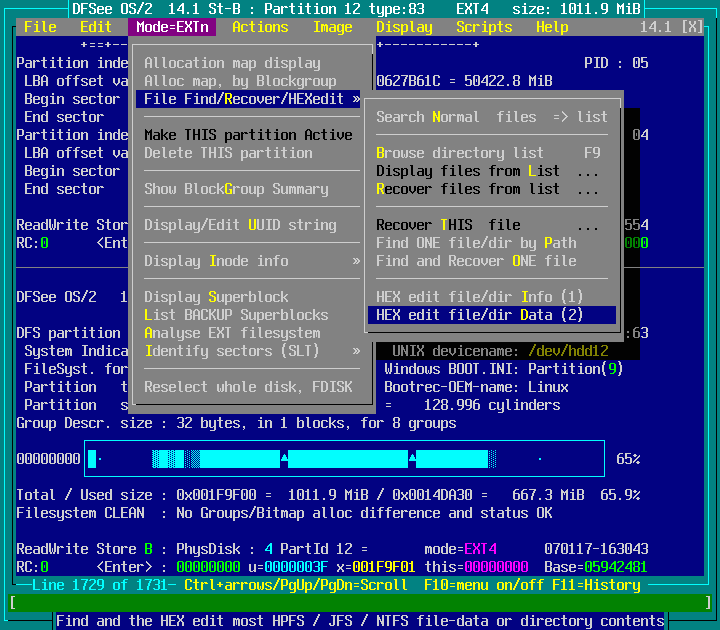
Find, then HEX edit most HPFS / JFS / NTFS file-data or directory contents

    This uses the specified path from the root-directory to locate
    information for the file or directory for that path.
    This will be from the FNODE on HPFS, the MFT-record on NTFS or
    similar structures like Inodes on other filesystrems.

    The path and filename may contain spaces.

    When found the information at the NEXT level (2nd, indirect)
    will be opened in the standard HEX editor

    This 'next' level is what would be displayed using a 'd' command
    or using the ENTER key when the first level is being displayed.

    It will often be data or contents for the file or directory.

    - - - - - - - - - - - - - - - - - - - - - - - - - - - - - - - - - - - - - - - - - -
    Press <F1> again for more help; Some options may require switching to 'Expert mode'
Display/Edit Volume info like label and UUID to be used with mount
    This submenu offers several selections to Display or Edit
    Volume properties like the volume label and UUID

    The label is a 16-character string, present in the superblock

    The UUID is a 16-byte unique identifier, used by Linux (on mounting)

    - - - - - - - - - - - - - - - - - - - - - - - - - - - - - - - - - - - - - - - - - -
    Press <F1> again for more help; Some options may require switching to 'Expert mode'
Display/Edit the standard 16-character label in the superblock (for mount)
    This will present a small dialog to display and/or edit the
    Linux specific label, with a maximum length of 16-characters
    and located in the SUPERBLOCK

    This Linux label is used (on Linux) to identify the filesystem
    when mounting, instead of a devicename like /dev/sda1 or the
    cryptic UUID

    - - - - - - - - - - - - - - - - - - - - - - - - - - - - - - - - - - - - - - - - - -
    Press <F1> again for more help; Some options may require switching to 'Expert mode'
Display and optionally edit the (Linux) UUID string value in the superblock
    This will display and optionally update the UUID string in
    the filesystems superblock.

    - - - - - - - - - - - - - - - - - - - - - - - - - - - - - - - - - - - - - - - - - -
    Press <F1> again for more help; Some options may require switching to 'Expert mode'
Make the currently selected PRIMARY the 'active' partition for MBR/BIOS boot
    This will make the currently selected PRIMARY partition the
    ACTIVE one for the disk.

    There should only be a single active partition on every disk.
    When the system starts, the BIOS will usually boot from
    the ACTIVE partition on the first disk.

    In IBM BMGR/LVM terms the active partition is called STARTABLE.

    - - - - - - - - - - - - - - - - - - - - - - - - - - - - - - - - - - - - - - - - - -
    Press <F1> again for more help; Some options may require switching to 'Expert mode'
Delete the currently selected partition from the partition tables
    This will delete the partition that is currently selected to be
    deleted from the partition-tables. This will result in the space
    occupied by the partition becoming FREESPACE that can be used
    again to create new partitions.

    For primary partitions on LVM-systems, the related LVM-information
    is cleared as well, to avoid consistency problems later when a new
    partition is created at the same position.

    - - - - - - - - - - - - - - - - - - - - - - - - - - - - - - - - - - - - - - - - - -
    Press <F1> again for more help; Some options may require switching to 'Expert mode'
List group#, Super/UNINIT/ZEROED flag, Used blocks BM/Descriptor (Dirtyness)
    List group#, Super/UNINIT/ZEROED flag, Used blocks in BM/Descriptor
    This gives a listing with one line per Blockgroup showing the group#,
    flags, used-block-count from Bitmap versus Descriptor and difference.

    The groupnumbers start at 0 for the first group, holding the primary
    superblock and Group-Descriptor-Table, and optional bootsector (GRUB)
    with the remainder used for metadata as well as regular dir/file data.

    Other groups only have metadata and real dir/file data, except for the
    ones that are flagged as being a BACKUP group, which contain a backup
    of the superblock and the Group-Descriptor-Table at the start.

    The number of blocks that are IN-USE can be gotten from either the
    Block-bitmap (up to date) or from the group-descriptor (lagging)

    When the values for both are the same (OK), this group has consistent
    or 'clean' allocation info, when not, the difference is shown in red
    and is an indication of the 'Dirtyness' of this group.

    The displayed blockgroup specific (flag) indicator values:

        S = Superblock/GDT BACKUP group     (calculated, not a real flag)
        B = Block bitmap for group is not initialized yet  (BLOCK_UNINIT)
        I = Inode bitmap for group is not initialized yet  (INODE_UNINIT)
        z = Inode Table  for group is zeroed  (lazy init)  (INODE_ZEROED)

    - - - - - - - - - - - - - - - - - - - - - - - - - - - - - - - - - - - - - - - - - -
    Press <F1> again for more help; Some options may require switching to 'Expert mode'
Display specified Inode sectors or one of the special ones (Journal, Resize)
    This submenu allows ypu to display information for Inodes,
    eithe one specified by its Inode-number, or one of the special
    one for the filesystem, like the ROOT-directory

    - - - - - - - - - - - - - - - - - - - - - - - - - - - - - - - - - - - - - - - - - -
    Press <F1> again for more help; Some options may require switching to 'Expert mode'
Display any Inode sector, by specifying the Inode-number
    This will display information for the file or directory referenced
    by the Inode-number specified.

    This may include filenames, flags, date and time as well as
    filespace allocation details.

    Note: The Inode-sector has to be identified by its (hexadecimal)
          Inode number, as found in directory details or 'well-known'
          ones like 02 for the root-directory.

    - - - - - - - - - - - - - - - - - - - - - - - - - - - - - - - - - - - - - - - - - -
    Press <F1> again for more help; Some options may require switching to 'Expert mode'
RootDir, main index to the volumes regular files and directories for the FS
    This is a system Inode, dedicated to RESIZING the filesystem.

    Note that it DOES NOT have the standard allocation information,
    instead, there is a single block of additional info, as shown
    by the Inode display.

    - - - - - - - - - - - - - - - - - - - - - - - - - - - - - - - - - - - - - - - - - -
    Press <F1> again for more help; Some options may require switching to 'Expert mode'
Special Inode used to track information for filesystem RESIZE reserved areas
    RootDir, main index to the volumes regular files and directories,

    This is a normal Inode for a directory, but since it is the root
    of the directory/file tree, it is the most important one to find
    anything by name ...

    - - - - - - - - - - - - - - - - - - - - - - - - - - - - - - - - - - - - - - - - - -
    Press <F1> again for more help; Some options may require switching to 'Expert mode'
Special Inode for the JOURNAL, with records of (metadata) changes to the FS
    This is a system Inode, dedicated to JOURNAL-FILE that keeps
    records for all recent filesystem changes, and is used when
    recovering from system-crashes (rollback/roll-forward) and
    by some UNDELETE utilities as well.

    - - - - - - - - - - - - - - - - - - - - - - - - - - - - - - - - - - - - - - - - - -
    Press <F1> again for more help; Some options may require switching to 'Expert mode'
Display the SUPERBLOCK structure for the currently selected filesystem
    This will display the contents of the filesystem superblock
    in a textual format matching the current filesystem type.

    - - - - - - - - - - - - - - - - - - - - - - - - - - - - - - - - - - - - - - - - - -
    Press <F1> again for more help; Some options may require switching to 'Expert mode'
List group#, block# and sector# for BACKUP Superblock and Group Descriptors
    List group#, block# and sector# for all BACKUP Superblocks.

    Each of these is followed by a BACKUP Group Descriptor Table

    - - - - - - - - - - - - - - - - - - - - - - - - - - - - - - - - - - - - - - - - - -
    Press <F1> again for more help; Some options may require switching to 'Expert mode'
Check filesystem for inconsistencies and errors (Readonly, no fixing!)
    This will perform a CHECK of the filesystem, somewhat like the
    well-known CHKDSK but without automatically fixing anything.

    The result of the check is a sector-lookup-table (SLT) that contains
    information about all recognized filesystem areas that are in use.

    Any error recognized will be flagged in the default display of
    this SLT that is performed automatically by the CHECK command.

    - - - - - - - - - - - - - - - - - - - - - - - - - - - - - - - - - - - - - - - - - -
    Press <F1> again for more help; Some options may require switching to 'Expert mode'
Create Sector Lookup Table (SLT) if needed, display as table or sector info
    This submenu allows you to build and inspect a 'Sector lookup Table'
    or SLT, that collects some info about each identifiable sector range
    in the currently selected filesystem.

    The SLT is the basis required to identify specific sectors, showing
    to what file or FS-metadata it belongs, and for the CHECK command.

    - - - - - - - - - - - - - - - - - - - - - - - - - - - - - - - - - - - - - - - - - -
    Press <F1> again for more help; Some options may require switching to 'Expert mode'
Show layout of current object by displaying parts of the Sector Lookup Table
    This will display part of the sector-lookup-table (SLT)

    You wil be presented with an option dialog first, where you
    specify the desired format and part of the SLT to be displayed.

    The SLT will be built automatically if not done yet, and it will
    have been built by any previous CHECK command too.

    Building the SLT will take place in the background while the
    dialog can be used freely to specify any options for displaying.
    After the dialog has been ended, and the SLT is ready, it will
    be displayed as requested.

    Typically the SLT will contain at least one entry for every file
    on the filesystem, so there could be hundreds of thousands lines!

    - - - - - - - - - - - - - - - - - - - - - - - - - - - - - - - - - - - - - - - - - -
    Press <F1> again for more help; Some options may require switching to 'Expert mode'
Show identification for specified (or current) sector, using the SLT
    This will display information about the specified sector that is
    available in the sector lookup table (SLT)

    The most useful info is the sector referencing this sector, this
    often leads to showing to which file/directory the sector belongs.

    The SLT will be generated automatically if not yet available

    - - - - - - - - - - - - - - - - - - - - - - - - - - - - - - - - - - - - - - - - - -
    Press <F1> again for more help; Some options may require switching to 'Expert mode'
Show identification for the last sector used, dictating the minimum FS size
    This will display information about the sector that is the last
    one being used (allocated) in the filesystem, and because of that
    dictates the MINIMUM size for the filesystem for a RESIZE.

    The most useful info is the sector referencing this sector, this
    often leads to showing to which file/directory the sector belongs.

    The SLT will be generated automatically if not yet available,
    just as the required allocation information (alloc).

    - - - - - - - - - - - - - - - - - - - - - - - - - - - - - - - - - - - - - - - - - -
    Press <F1> again for more help; Some options may require switching to 'Expert mode'
Unselect filesystem, reselect the same/first disk; enables Mode=FDISK menu

    This will UNSELECT the current object/filesystem, and reselect a
    whole physical disk, either the same disk as the partition was on,
    or the first disk present in other cases.

    This is a quick way to change to 'Mode=FDISK' and work on
    disk-level issues

    - - - - - - - - - - - - - - - - - - - - - - - - - - - - - - - - - - - - - - - - - -
    Press <F1> again for more help; Some options may require switching to 'Expert mode'
| (to DFSee main pages) | File | Edit | Actions | Image | View | Scripts | Set | Help | (to BASIC menu) |
| Mode=FDISK | APFS | AUX | DUMPFS | EXTn | EFAT | FAT | HFS+ | HPFS | ISO | JFS | NTFS | REISER | SWAP | XFS |
| (Mode=EXTn page) | DFSee menu documentation for pulldown : Mode=EXTn |
| Views: 625298 |
|
Created by Jan van Wijk: Aug 2007, last update: 23-Oct-2022 |
|